
I’ve recently partnered with CamRanger SA and Sunshine Company down in Cape Town, and it's been a good ride. I've been playing with the Camranger for a few weeks now, and man, is this thing powerful.
The CamRanger allows you fully to control your camera from your iPad/iPhone, wirelessly. And when I say “fully”, I’m not kidding - you’ve got full control over the exposure controls, as well as shutter release control, HDR, time-lapse, and even fine focus control. It’s pretty amazing.
Over the next few weeks, I’ll be teaching you how to use the Camranger. I’ll start off today with the basics. So let’s jump right in.
The CamRanger connects to your camera via the USB port (the one you’d normally tether with). Once you plug the CamRanger into the USB port on your camera, you’ll need to download the CamRanger app from the App Store. Don’t worry, it’s free.
Once you’ve got the App installed, just follow the instructions to get the CamRanger hooked up to your iPad. It’s pretty straight forward.

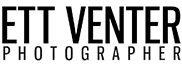
So here’s what you should be presented with, more or less:

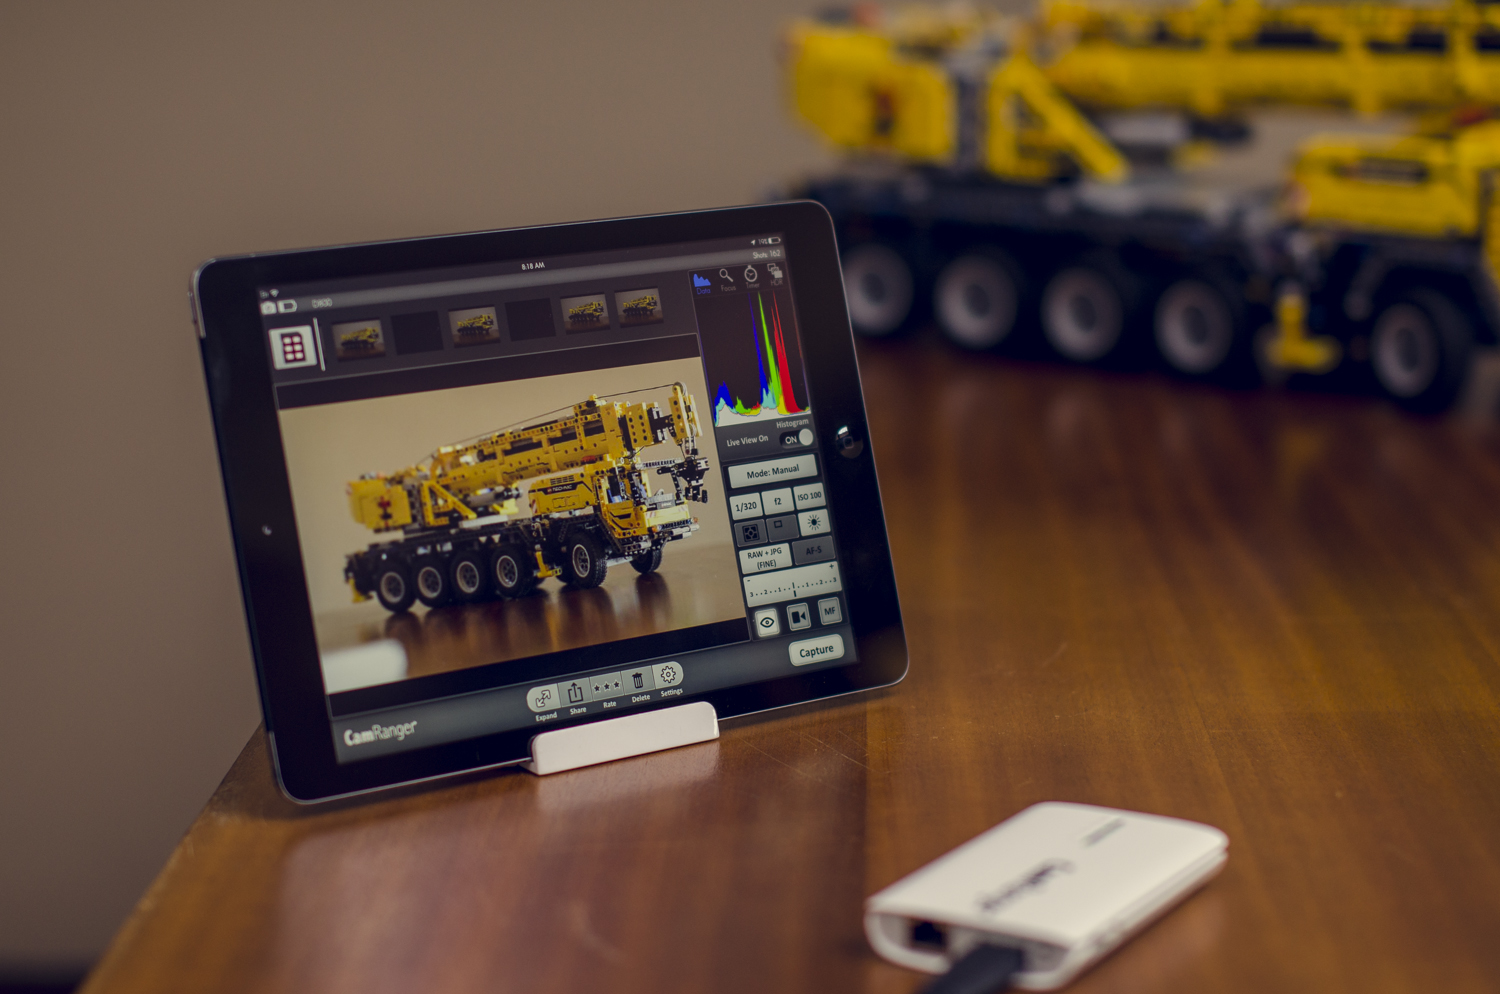
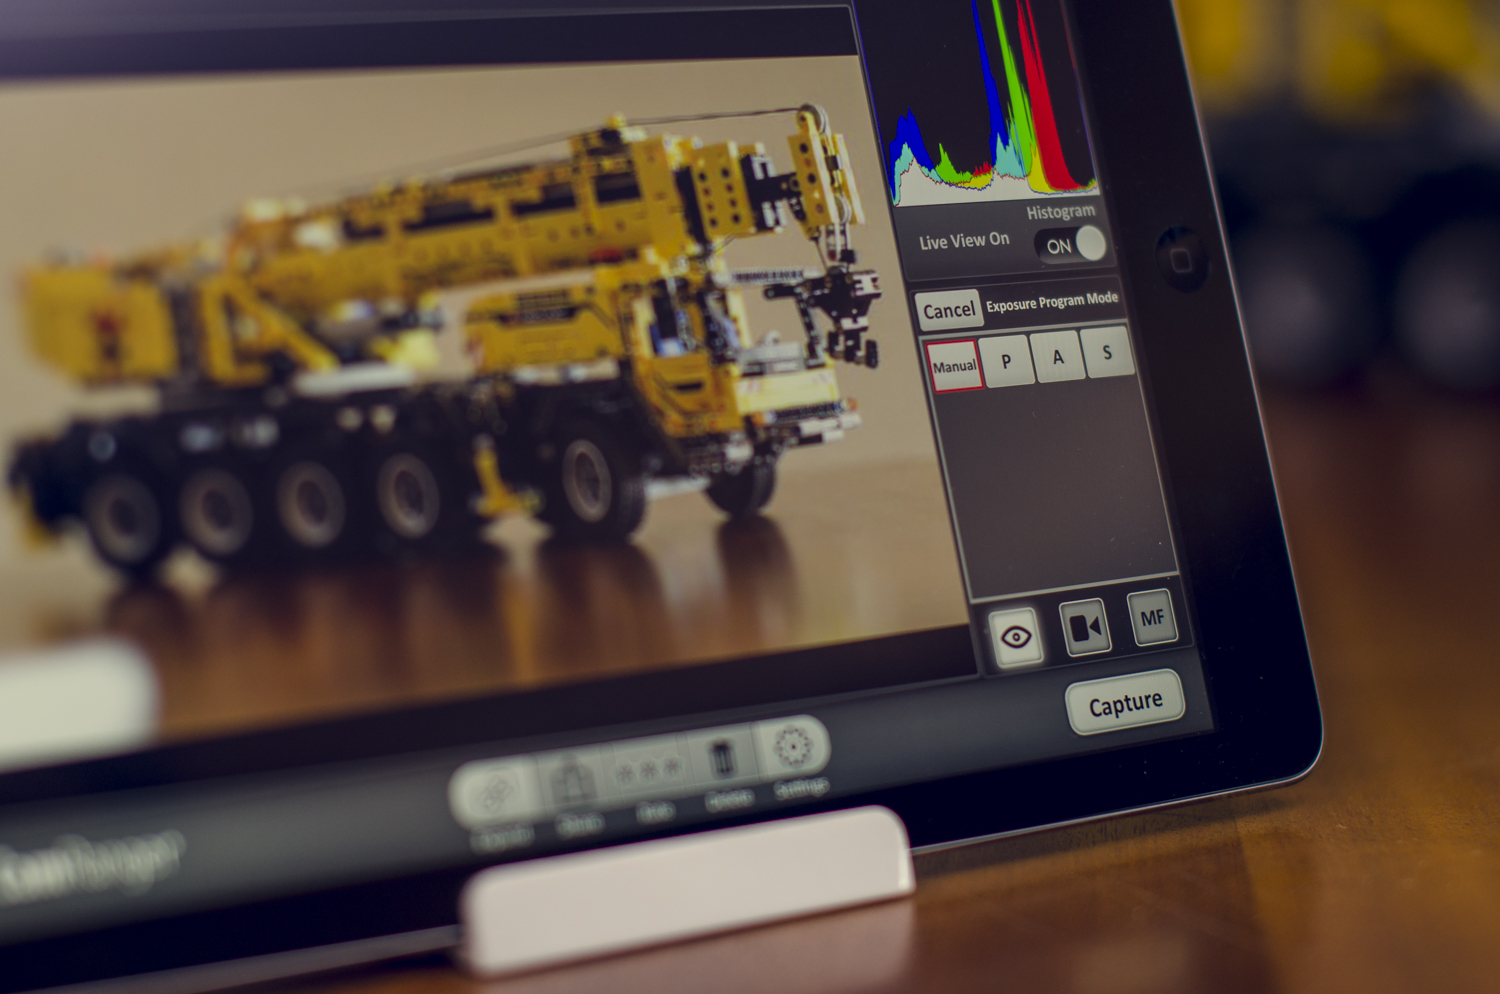
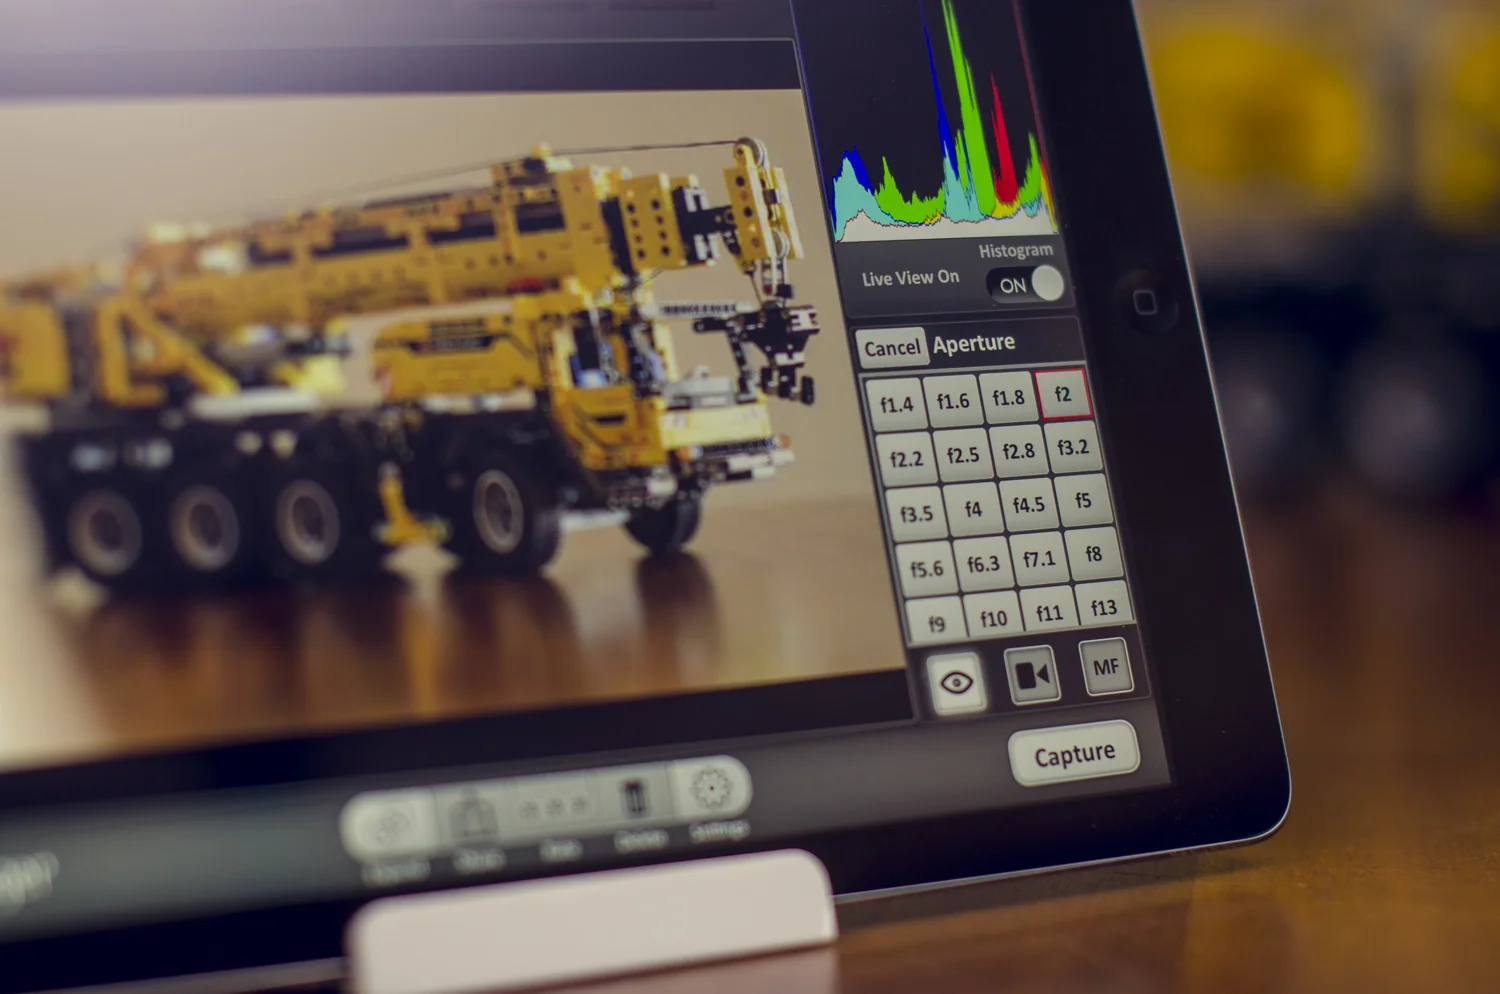
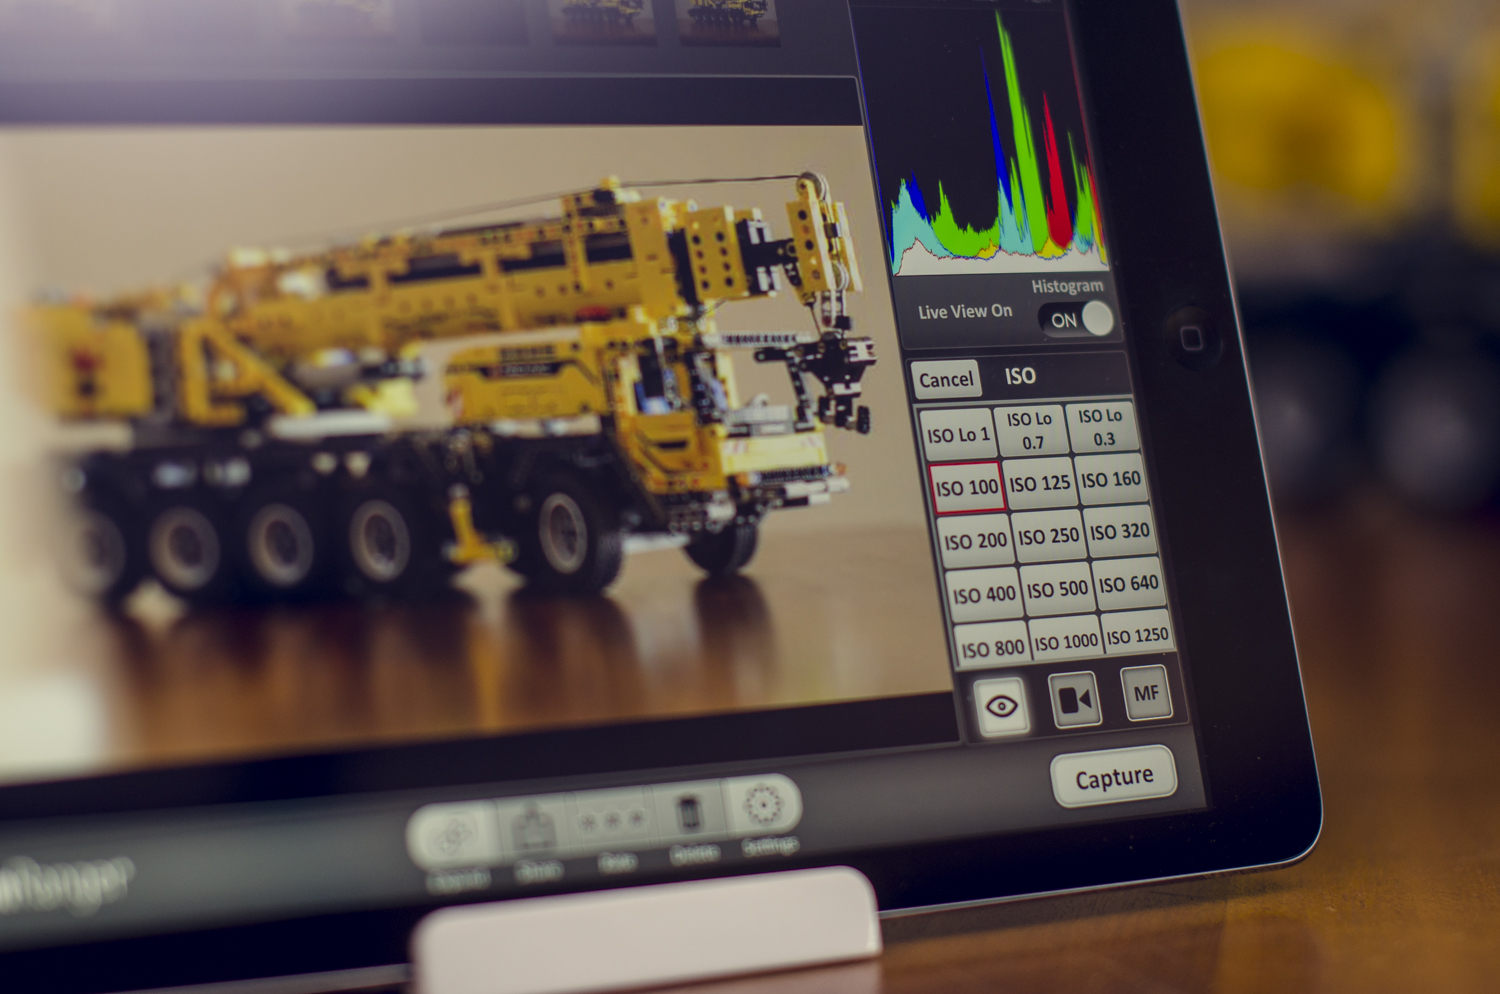
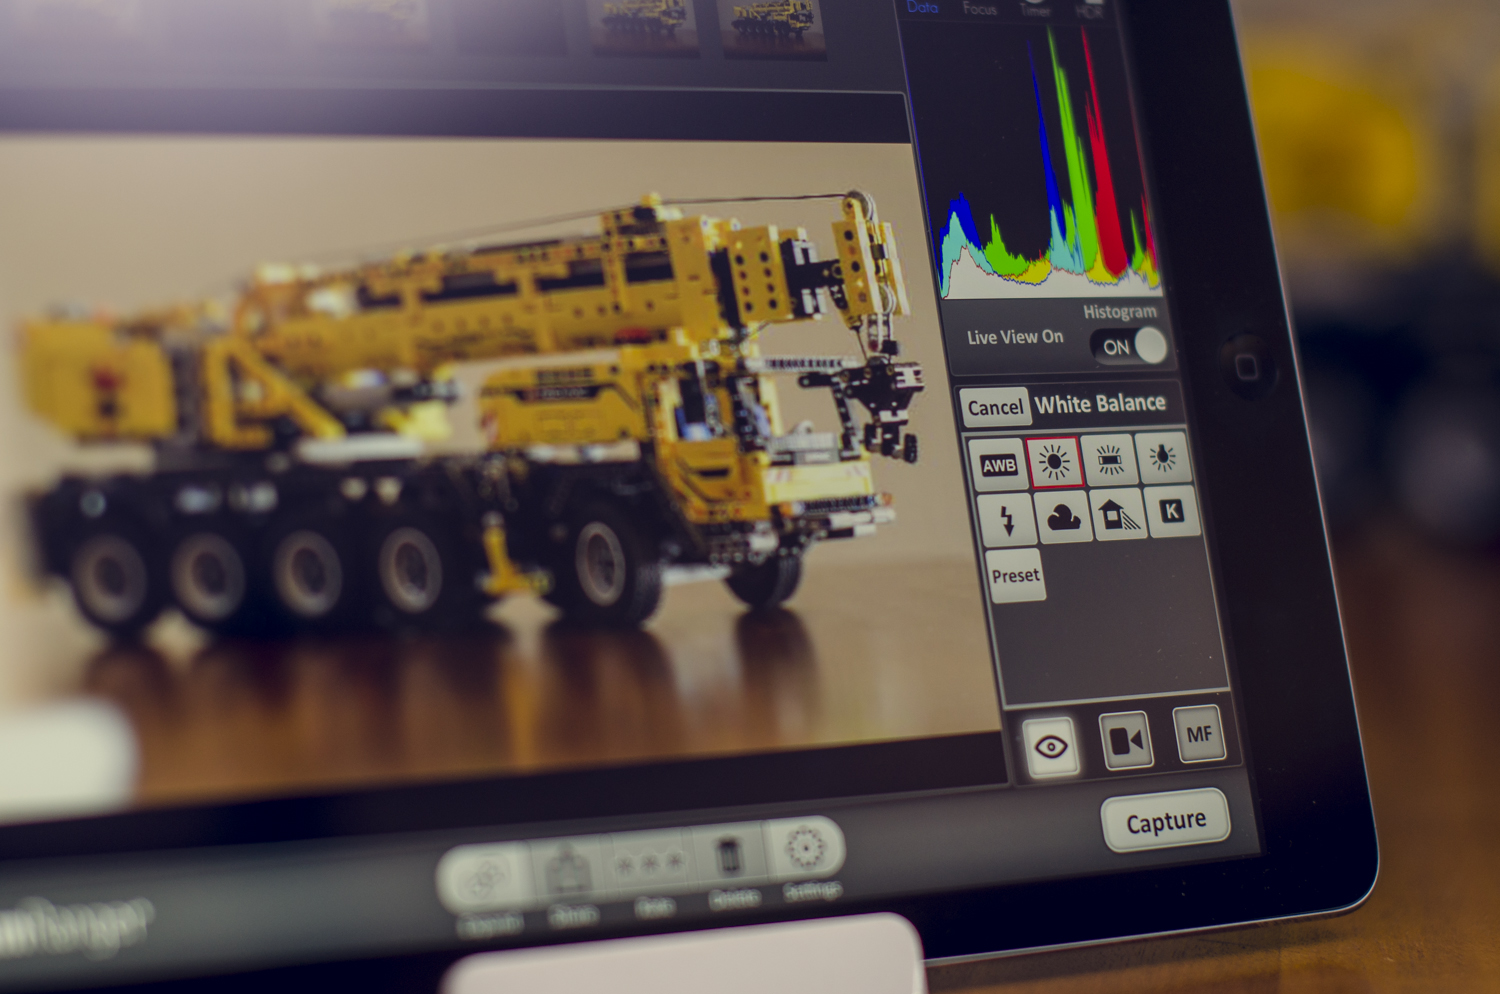
This panel on the right is essentially the main control panel. Here you’ve got full control over everything you could want to control on your camera.

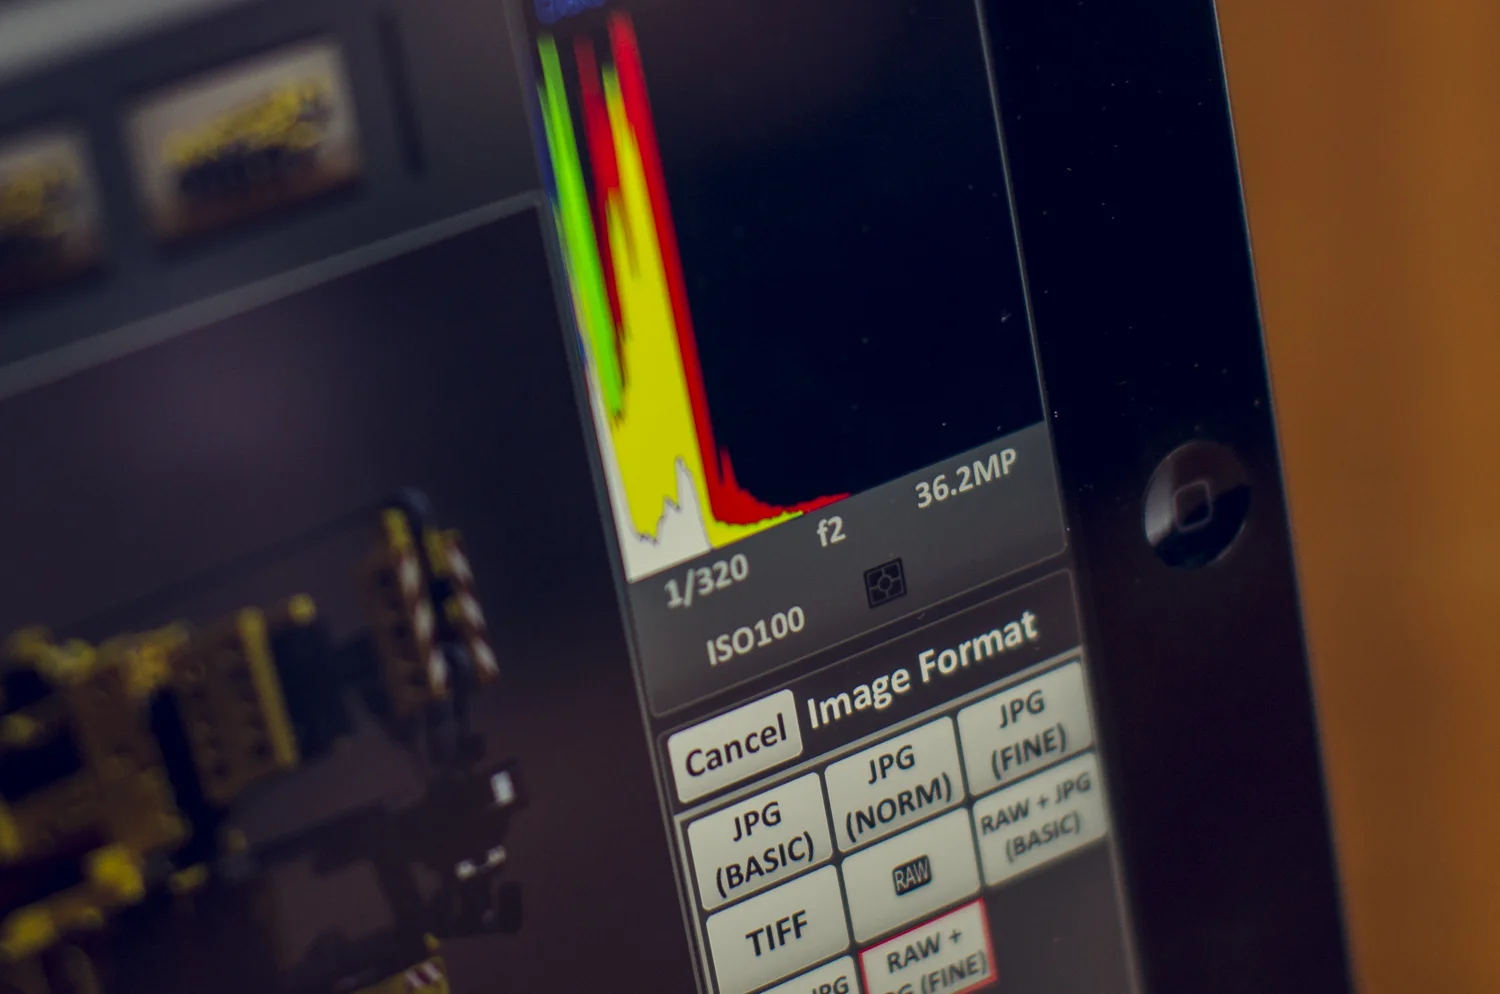
If you’d like to change on of the settings, you just tap on the setting, and the control panel will change and display the various settings you can change that variable to. Something important to note is that you’ve got the ability to see a live feed directly from your camera using the live view button in the app.
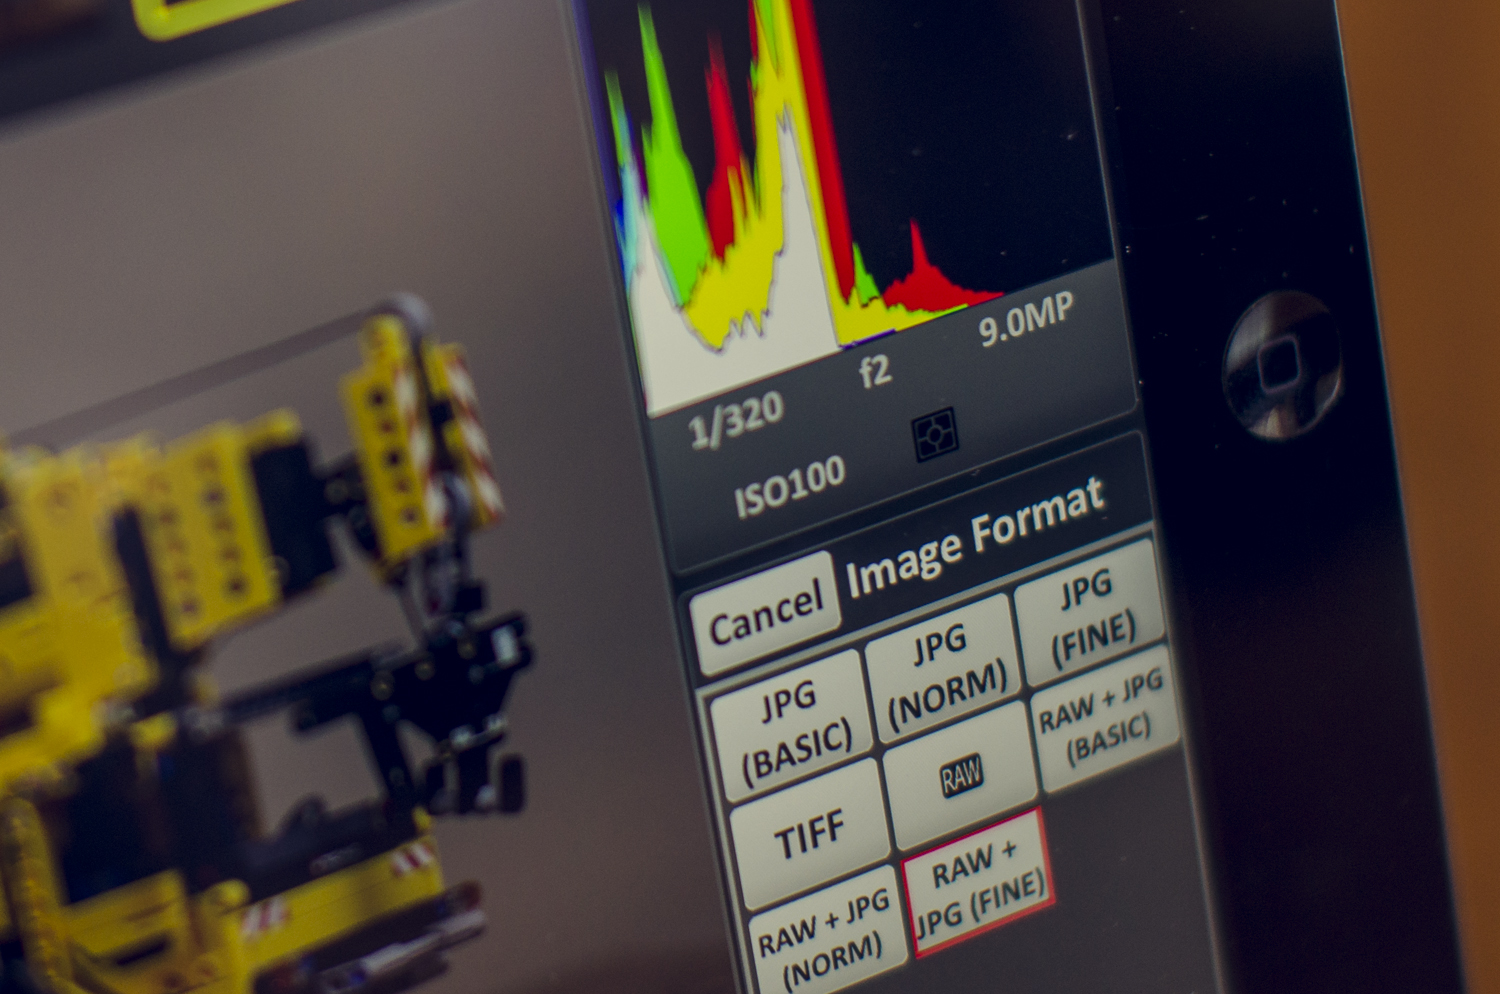
Something else you can change (and something I’d encourage you to change) is the quality setting. Along with shooting in RAW (which you should always be doing), you can set your camera to shoot JPEGs as well.

This might not be something you do when you’re shooting without a CamRanger, but when you are, it would be a wise decision to create low resolution JPEGs along with your RAW files. The reason for this is that if you only shoot RAW, the camera is going to send full-res files to the CamRanger, which will increase the transfer time. In my case, my 36MP D800 files take so long that it makes using the CamRanger an incredibly exhausting experience. The moment I have the camera creating small JPEG files, the transfer between the CamRanger and my iPad is significantly faster, as now the files being transferred are only 9MP.
Once you’ve got your settings dialled in, it’s time to pick the point you want to focus on, which is as easy as tapping on that point on the screen. Once you tap on the screen, the CamRanger takes control of the lens' autofocus motor and makes the correct adjustments. How nuts is that? You can also double tap the screen to get a 100% zoom to make sure you've nailed the focus.
So that’s it! Using this CamRanger is a piece of cake. It’s a good, solid setup that I find to be incredibly reliable.

The range on the wireless network that the CamRanger sends out is big as well. I did some long exposure work a few nights ago, and ended up standing on almost the opposite side of a highway I was photographing, while I was controlling the camera from my iPad.
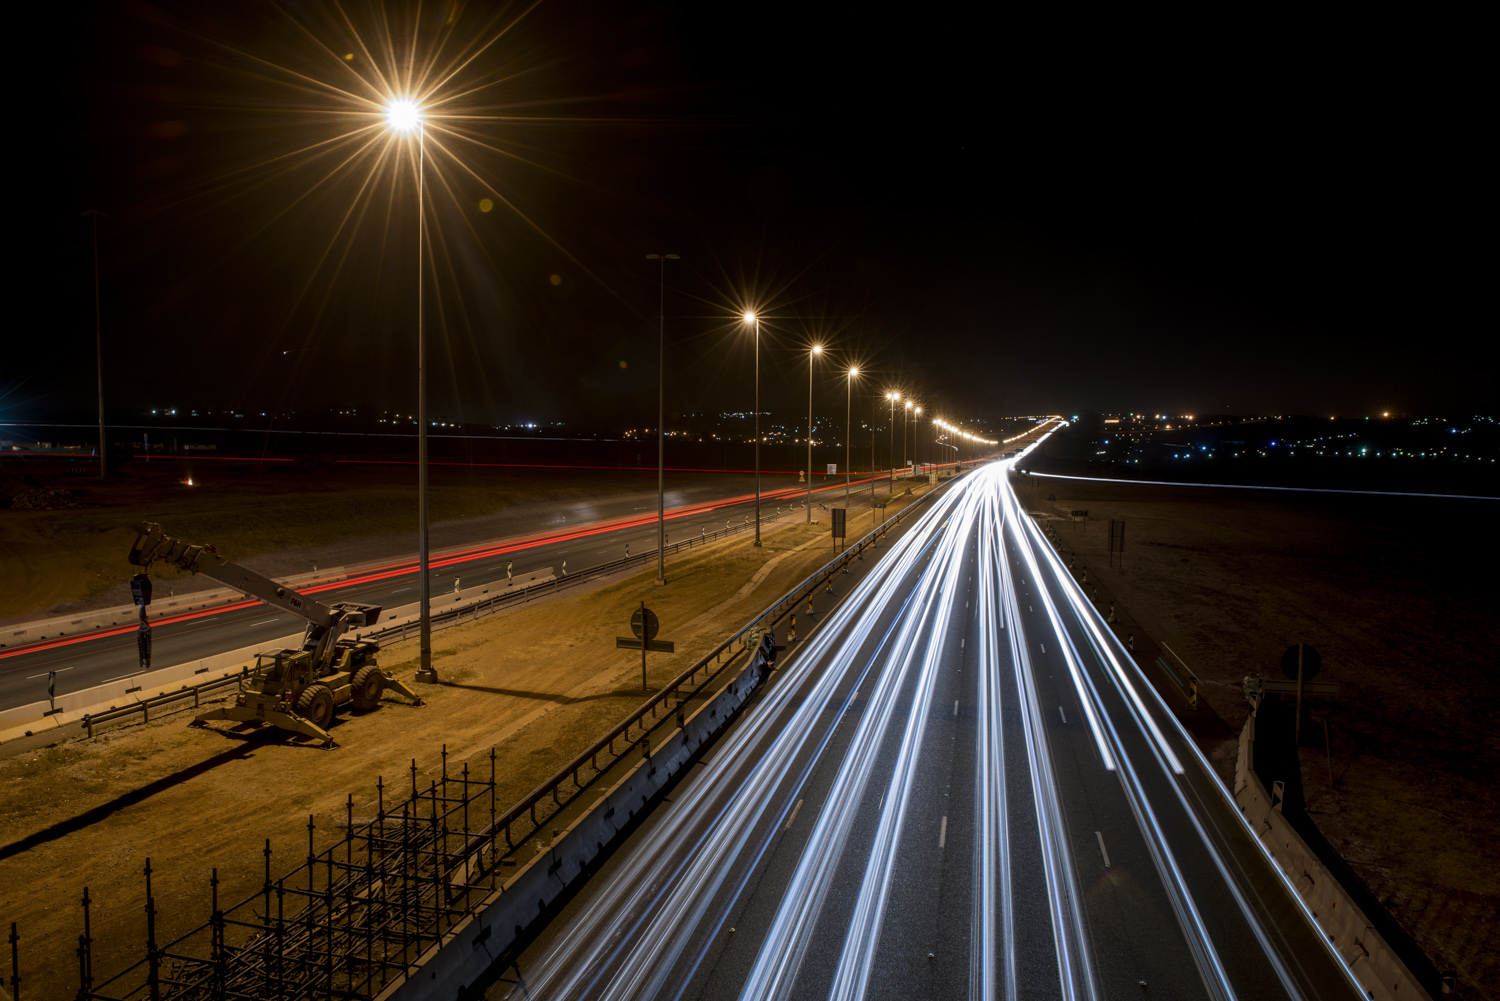
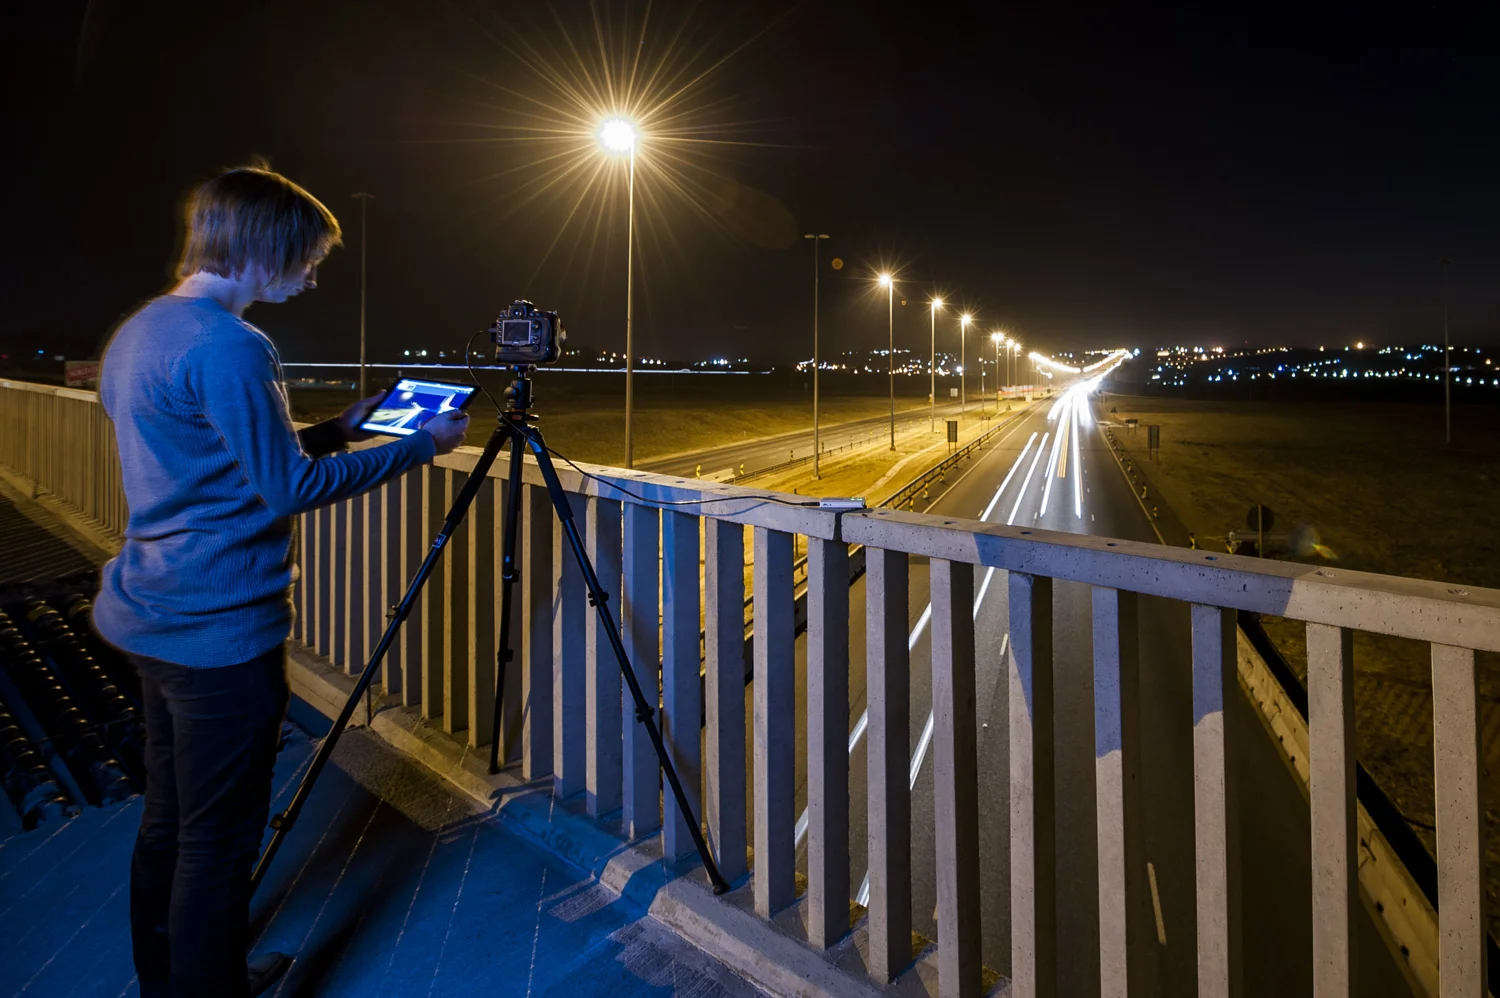
So here’s the image I shot for this tutorial. I did 100% of the control in this shot on my iPad. In fact, I even composed the shot using my iPad, without looking through the viewfinder in my camera (or using liveview) once.

In the next tutorials I’ll be coving the finer focus control, Focus Stacking, HDR, as well as Timelapse, to name a few.